Table of Contents
The Sound of the Click: My Journey to Stress-Free Paws
I remember the first time I realized I was doing it all wrong. My dog, a rescue with paws the size of dinner plates, would see me reach for that drawer in the kitchen—the one where the clippers lived—and he’d vanish. Not just move to the other room, but tuck himself into the furthest, darkest corner of the house. It broke my heart because I realized that how to trim your dog’s nails wasn’t just a maintenance task; for him, it was a breach of trust.
I used to think of grooming as something to “get through.” I’d brace myself, he’d brace himself, and we’d both end up exhausted and frustrated. But over the years, through trial, error, and a lot of deep breaths, I learned that the secret isn’t in the tool you use. It’s in the conversation you have with your dog before the tool ever touches their paw. This 2026 guide is the culmination of everything I’ve learned about turning a dreaded chore into a bonding moment.
Why We Both Used to Dread Nail Day
For most dogs, having their paws handled feels inherently vulnerable. In the wild, their feet are their livelihood—their means of escape and their primary contact with the world. When we grab a paw and squeeze, we are effectively taking away their “flight” option. My dog used to pull back instinctively, and I would hold tighter, thinking I was helping by being firm. I wasn’t. I was just confirming his fear.
I noticed that the more I rushed, the more he resisted. Dogs are incredible mirrors of our energy. If I was stressed about the possibility of “quicking” him (cutting the blood vessel inside the nail), he felt that tension. It took me a long time to realize that my own heart rate was often the biggest obstacle to a successful trim.
Understanding the Language of the Paw
Before you even think about how to trim your dog’s nails, you have to learn to read their subtle “no.” It isn’t always a growl or a pull. Sometimes it’s a lip lick, a yawn, or a slight stiffening of the leg. When I started pausing the moment I saw these signs, my dog started trusting me more. He realized I was listening.
Building this trust is like putting money in a bank. Every time I touched his paw and didn’t clip a nail, or every time I stopped because he looked uncomfortable, I was making a deposit. Eventually, the balance was high enough that he felt safe letting me do the actual work.
The Anatomy We Can’t See: Respecting the Quick
The “quick” is the sensitive nerve and blood vessel inside the nail. On white nails, it’s easy to see—it’s that pinkish glow. But on black nails, it’s a guessing game that used to keep me up at night. I learned that the nail isn’t just a dead piece of keratin like ours; it’s an extension of their skeletal system.
If the nails get too long, they push the toe bones up, changing the way the dog walks and eventually causing arthritis. Knowing this changed my perspective. I wasn’t “bothering” him; I was protecting his mobility. But doing it safely meant learning to shave off thin layers rather than taking one big, risky chunk.
Step 1: The Art of the ‘Check-In’
The first tip I always give is the “Check-In.” This is where I sit on the floor with my dog without any tools. I just pet him, moving my hand down to his shoulder, then his elbow, then his wrist. If he lets me hold his paw for three seconds without pulling away, he gets a reward.
This isn’t grooming; it’s a conversation. I’m asking, “Are you okay with me being here today?” If he’s having an off day—maybe his joints are stiff or he’s overstimulated—I don’t push it. We try again tomorrow. This simple shift from “I am doing this to you” to “We are doing this together” changed everything.
Step 2: Desensitization Without the Tools
My pet used to be “hand-shy” with his feet. To fix this, I spent weeks just massaging his paws while we watched TV. I’d gently separate his toes, touch the pads, and even tap the nails with my finger. I wanted him to associate paw handling with relaxation and affection.
I’ve found that many owners skip this step, but it’s the foundation. If your dog won’t let you hold their paw comfortably for 30 seconds, they definitely aren’t ready for the clippers.
Step 3: Introducing the Gear Gently
When I finally bring the clippers or grinder out, I don’t go for the nail right away. I let him sniff the tool while it’s closed. Then, I’ll “click” the clippers in the air or turn the grinder on nearby so he gets used to the sound.
Every sound is followed by a high-value treat. Over time, the sound of the grinder became a “dinner bell” of sorts for him. He stopped associating the noise with pain and started associating it with his favorite snacks.
Step 4: The ‘Low-Stake’ Snipe
One of the biggest mistakes I made early on was trying to do all four paws in one sitting. Now, I might only do one nail. Just one. If that goes well, we celebrate and stop.
This takes the pressure off both of us. If you do one nail a day, you’ll finish a whole dog in less than three weeks, and by the time you’re done, the first nail is ready for a tiny maintenance trim again. It keeps the nails short without the marathon of stress.
Step 5: Managing the Environment
I learned that the “where” matters as much as the “how.” If I try to trim nails on a slippery hardwood floor, my dog feels insecure. He can’t get a grip, and that adds to his anxiety.
Now, I use a yoga mat or a rug. It provides traction and makes him feel grounded. I also make sure the lighting is excellent. If I can’t see the “chalky” center of the nail (the sign that you’re getting close to the quick), I’m not cutting.
Step 6: Using Distraction as a Tool
While I prefer building pure trust, sometimes a little “bribery” helps the medicine go down. I’ve used lick mats smeared with peanut butter (xylitol-free, of course!) stuck to the fridge at his eye level.
While he is focused on the treat, I can gently work on the back paws. Back paws are usually less sensitive than front paws, making them a great starting point for building confidence.
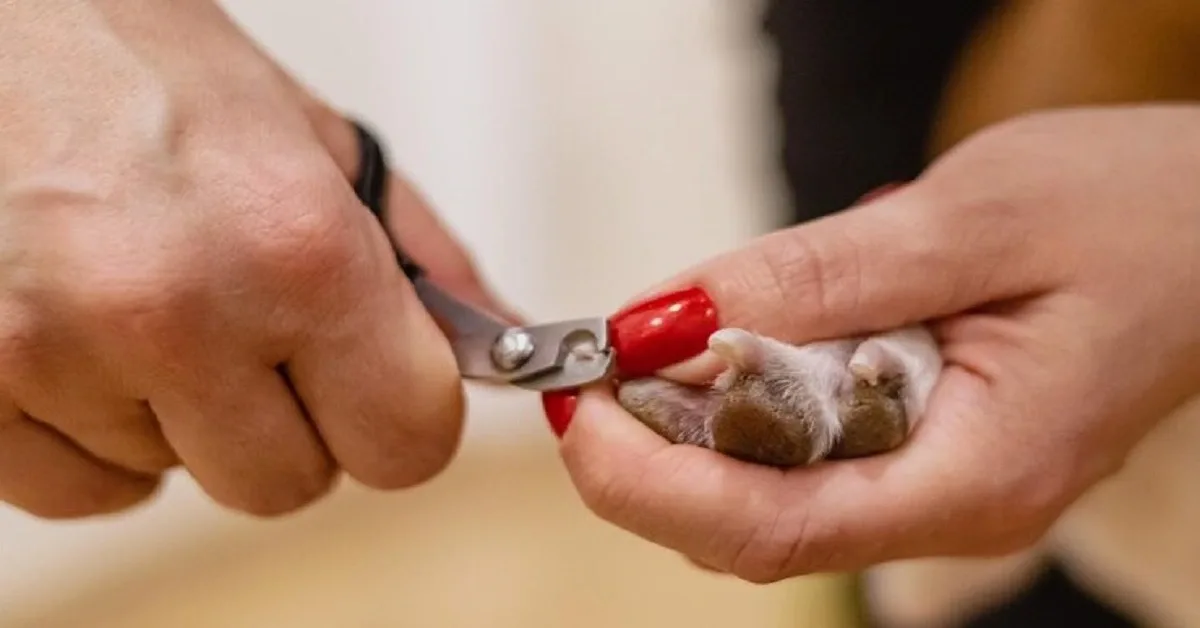
Step 7: Identifying the ‘Sweet Spot’ for Cutting
When you look at the nail head-on after a small snip, you’ll see a white, chalky circle. As you get closer to the quick, that circle turns darker and looks almost “meaty” or moist. That is your stop sign.
I’ve learned to cut at a 45-degree angle, following the natural curve of the nail. This prevents the nail from crushing or splintering, which is often what causes the “pinch” that dogs hate so much.
Step 8: Dealing with Accidents Calmly
Even after years, I occasionally nick the quick. The first time it happened, I panicked, which made my dog panic. Now, I keep styptic powder (or even cornstarch in a pinch) right next to me.
If it happens, I immediately apply the powder, give him a huge handful of treats, and—this is the hard part—I don’t make a big deal of it. If I stay calm, he stays calm. We stop for the day, and I make sure his next session is just “paws and pets” to rebuild that tiny bit of lost confidence.
Step 9: Alternatives for the Truly Fearful
For some dogs, the trauma of past bad experiences is too much for clippers. My neighbor’s dog was like this. We worked together to introduce a “scratch board”—basically sandpaper on a board.
The dog “digs” at the board, naturally filing down their own nails. It turned a terrifying grooming session into a game of “paw.” It’s a great way to maintain length while you work on the deeper behavioral issues of handling.
Step 10: Consistency Over Perfection
I used to wait until his nails were clicking on the floor like tap shoes. That was my mistake. By then, the quick had grown long, making it impossible to get the nails short again in one go.
Now, I do a “micro-trim” every two weeks. By just taking the tips off regularly, the quick naturally recedes over time. It keeps the sessions short (usually under five minutes) and keeps his paws in peak condition.
Common Mistakes I Made (So You Don’t Have To)
I want to be honest about where I failed because I think it helps to know you’re not alone. In the beginning, I used dull clippers. I didn’t realize they were squeezing the nail rather than cutting it. Always keep your tools sharp or replace the heads on your grinder regularly.
I also used to “chase” my dog. If he moved his paw, I’d follow it with the clippers. I learned that this is a game you will never win. If he moves the paw, let it go. Wait, reset, and ask again. It feels counterintuitive when you just want to “get it done,” but it saves you hours of struggle in the long run.
Interactive Reflection: Assessing Your Dog’s Comfort
Before your next session, take a moment to sit with your dog and ask yourself these three questions:
Does my dog stay in the room when they see the grooming kit?
Can I touch each individual toe without a “pull-back” response?
On a scale of 1-10, how high is my anxiety right now?
If your answer to the first two is “no” or your own anxiety is above a 5, today is a “training day,” not a “clipping day.” Spend time rewarding them for just being near the tools.
Frequently Asked Questions
A Final Thought from One Dog Parent to Another
If you’re feeling overwhelmed by how to trim your dog’s nails, please know that it’s okay. It’s a process, not a destination. Some months will be easier than others. There will be times when you get all twenty nails done in ten minutes, and times where you spend a week just trying to clip one dewclaw.
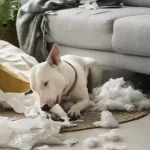
I know that when behavior feels out of control—whether it’s the paws or the living room furniture—it can test your patience. If you’re currently dealing with a pup who is acting out in other ways, you might find my guide on New Dog Destroys House: Stay Calm helpful for keeping your cool and rebuilding that bond.
The most important thing I’ve learned isn’t a technique or a tool—it’s the look in my dog’s eyes when he realizes he’s safe with me. That trust is worth more than a perfect manicure. Take it slow, be kind to yourself, and remember that every treat and every gentle pat is building a lifetime of better care.